Pages

MMJ 10 & June Challenge Summer Dress 2: Ahh dotty dotty

Friday, June 10

Yesterday the "bug" bit me again. After having promised myself not to sew after work, i decided I wanted a new maxi dress. This time I made sure I chose a simple and fast project. I love sewing yes, but waking up like a zombie in the morning is not my cup of tea. I wanted a maxi dress with sleeves, but I did not have any patterns at home that could help me. So I decided to use the top half of my new look 6816 pattern, as the top of the dress, and then use a rectangle for the rest of the dress.

Last weekend, on coming back from my sister's place, I decided to stop by goldhawk road, not to buy fabric, but to check out what lycra they had for swimming suits. I came out with so much fabric I had to hide them in the back garden before going through the front door, so my husband would not know I had fallen prey to the fabric buying sickness again.

One of the things I bought was this jersey fabric. I got 2.5 metres for £7. I used about 1.5 metres, so I still have some leftovers, which will should come in handy for another project. All in all, I spent about 2 hours from cutting to finishing. Not bad aye?

I decided to tie another headtie because my hair is horrible. I think I need to do my hair this weekend.

Porridge time yay!!!


Yum yum!!


Full view.
 Have a cracking weekend everyone.

MMJ 9 & June Challenge Summer Dress 1: The 1am dress

Thursday, June 9

I finally got around to making one of the Lisette pattern dresses.

Yesterday I felt like wearing something blue to work today, and fortunately I had a blue fabric in my stash so off I went. Call me crazy if you will, for starting a dress after work, I certainly called myself all sorts of names when I woke up this morning at 7am. When I say "woke up", i mean my mind was concious, my body was alert, but my eyelids would'nt stop their lovefest with each other. My eyes just wouldn't open. I was soooo sleepy....and I still had not finished the dress. I did the hem this morning, opting to use bias binding on the hem as i thought it would be faster than pressing and folding and doing whatever it is you have to do to have a presentable hem. In the end I liked the look I achieved with the biased bound hem.


I made view B. The dress is not really complicated, but the zip was another matter. Normally, zip insertions at the back are pretty straightforward (not always with me), because the seam is straight. A side seam however (which is what this dress has), is curvy, and that comes with its own fair share of issues. The pattern calls for a lapped zip, and after spending 1 hour trying to figure out how to press 1.3cm on the right seam and 1.5 on the left, and not having it come out the way its supposed to, I gave up and used the centred zip technique. 

MEMO TO SELF: Dedicate a whole day (or weekend?) to the mastering of zips.

I did a little change with the skirt of the dress. Instead of using the skirt pattern provided, I used the skirt of my trusted Vogue 8232. I did that because I wanted to make sure it would fit, as I did not have enough time to fix things if something went wrong the Lisette skirt.

The armholes are finished with bias binding, as called for by the pattern instructions. Fortunately I had some blue bias binding at home, which I used.

Another thing I like about this pattern is the dart detail at the front. Its in the shape of a "Y". When I was doing the darts, I did the right side first, and without ironing it, made the left side, then I turned it over to appreciate my handwork.....SHOCK ATTACK....it looked horrible. Like the little fool I can be sometimes, I did not press the first dart after stitching it. So I unpicked the stitches, and did the required pressing. The second attempt was a lot easier. So if you are thinking of making this pattern, DO NOT forget to iron the first dart before sewing the second one. It will make your life so much easier.


Passport Dress & Jacket Sewing Pattern


Notice the dart detail just above the waistline? I love it.


Biased hem

Take care, and have a lovely day.

Some MMJ and Holiday Wardrobe Challenge outfits

Monday, May 30


What a weekend its been.

I've been involved in an epic battle battle with a cold. I've downed more lemsip syrup this Weekend than my entire life. I really did overdose on Lemsip( yeah it was that bad). I did some sewing too ( when I felt better between spoonfuls of lemsip).

I finally put the zip on the other Vogue 8232 dress I was working on. This pattern seems to be my go to pattern, as this is the second time I'm making it (first time seen here). I also used the skirt for another dress I made a couple of months ago.

This time I found the zip really easy to insert. All that Lemsip probably unlocked some part of my brain. I think I need to stock up on lemsip syrup. I'm not saying I'm going to turn into a Lemsip addict....well if it does have anything to do with easy zip insertions, then I might.


I also did 3 maxi dresses. I did not use a pattern for 2 of them, just some personal measurements and elastic on one, and some ribbon on the other. For the 3rd one, I used Simplicity 2638 and the fabric I bought in April when Iwent to visit my in-laws.. The good thing about maxi dresses is that they are so easy to sew, and do not take an awful lot of time.


With this one I measured my hips, and cut 2 rectangles with that measurement, and my desired length . Then I made a casing at the top for the elastic, and hemmed the bottom. Simples!!


Simplicity 2638


With this one, I made two rectangles with my hip measurement and desired length. I left some inches off the top side seams, which act as the armholes, then made casings for both parts of the top, and put a ribbon through it. Job done.


Then I decided to do a little refashion. I had a not-so-new top I had at home, which i realised I did not wear often. So i decided to give it some love.

So old top and some fabric

Cut the top at the waistline

gather the top of the skirt

Sew it to the top. Finish off the seams and hem the skirt.

Tada!!!!!!!


So that's what I've been up to. I still feel really horrible, but the lemsip is doing its job.

Have a nice week everyone.
Posted by Picasa

2 down, 1 leaving me stressed

Saturday, May 21

I finally found time to sew my assembly line tops.

These are the two I've finished. On the first one, I cut of part of the hem, and and replaced it with a band because I wanted to have a tie band top. I don't know if thats what they are called. Gosh I seriously need a camera. My phone really is not the best.

I know I did a good job with this one because my husband did a double take when he saw me in it, and asked me if I made it ( with total disbelief on his face when i said yes.)


For this one I added ruffles at the front. When I made this pattern last time, I mentioned I wanted one with ruffles similar to a Boden top. In the end, I decided to place my ruffles differently, because I did not have enough fabric.


Sun getting the better of me
Now, the last one is supposed to have Peter Pan collars, and that, dear friends, is the source of all my issues with my assembly tops. I actually drafted the pattern for the collar, which was easier than I thought. Attaching it to the blouse is proving quite difficult for me. I don't know what to do right now, and I have just given up on it ( for now). Sewing should be exciting, and I see it as way for me to relax, and when I started shouting at myself every time I did the collar badly, I knew it was time to stop. So I am going to tackle this collar when I get a burst of inspiration. Hopefully that should be before June!!


Has anyone done Peter Pan collars before? Any advice on how I could proceed with this? Come to think of it, I have never made anything with a collar before. This was going to be my first, and I was really excited about the fact that I drafted the collar myself. Oh well!!! 
My goliath
Sewing these tops assembly line style has taught me a couple of things. 
  1. Do a lot of planning before you start production. I started out with the intention of sewing the same top with three different fabrics, but then changed my mind after I had already cut them. This resulted in delays. If I was actually in a clothing factory, I would have lost customers because I would not have delivered on time.
  2. If you are going to do an assembly line project, you have to make sure the fabric can all be sewn with a common thread. There is nothing more annoying than having to change thread every time you want to sew something else. The purpose of the assembly line technique is to sew all the items simultaneously, and if you have to change thread all the time, you will end up wasting a lot of time, and the experience will not be enjoyable. I was lucky enough that I used black thread for all three of them when sewing the main bits, but I had to change thread when doing the bias binding for the all of them ( not amusing at all).  
  3. Following Miss P's advise, I finished off the edges before sewing the pieces together. This was good because that meant I did not have to worry about that later, and it made sewing a lot easier for me. I use my machine to overlock my edges so changing presser feet every time I have to finish seams off is always a hassle. I did all the darts and back seams first, then attached front and back together and did the side seams. From this point I started sewing them individually because they all had different finishes. 
I would definitely try this again, but this time, with skirts. I do not have enough skirts, so this might work. 

The sun is out in full force today in London. I best go out and enjoy it.

Have a lovely weekend everyone.

xoxo

2 hours well spent

Wednesday, May 11

Yesterday after work I decided to do an inventory of things I would wear during Me Made June.

SHOCK ATTACK!!

Not only did I not have up to 10 things I'd consider wearing to work, I realised I did not have any me made skirts. At this rate, I run the risk of going 7 outfits for a whole month. Not a pleasant  thought.

So, like any self-respecting sewist, I hit the blogosphere to find inspiration for a quick skirt project. I decided on a gathered skirt with an elastic waist inspired by Alli, of One Pearl Button. The drafting instructions are here, on Grosgrainfabulous . The good thing about this apart from being quick to sew, was the fact that it does not have a zip, my nemesis.


Skirt getting ready to go to work

Skirt helping me make mincemeat of pivot tables at work

There were two issues I had with making this.

1) I did not have an old skirt or dress as the instructions called for, so I had to do some calculations of my own, and come up with a gathered skirt.

2) The skirt does not have pockets, but I wanted my skirt to have a pocket, so I had to modify it somewhat.

What did I do?

  1. I measured my wasit = 30"
  2. I measured the length I wanted my skirt to be = 25" ( including 1" hem allowance)
  3. I used my waist measurement to cut my elastic band. = 30"
  4. Then I added 10" to my waist measurement, and and cut two pieces of fabric with that measurement = 2 seperate pieces of 40" width by 25" length
  5. Then I cut four pockets using the pocket pattern from the simplicity pattern I used for my green dress
  6. With right sides together, I joined the pockets to each side of my skirt front and back pieces.
  7. Then I joined the front and back pieces together and overlocked the edges ( if you don't have an overlocker or overlocker foot, you can use a zig-zag stitch, or finish the seams using french seam or any other seam finishing techniques.
  8. I stitched two lines round the waist, using long machine basting stitches, and gathered the skirt.
  9. I stitiched the edges of the elastic band together, and pinned it to the skirt, right sides together.
  10. I used a zig-zag stitch to attach the skirt to the elastic.
  11. Press your skirt, and job done.
Not much of a tutorial. I don't consider this a tutorial as I did not come up with the idea, but adapted Alli's method, to suit my needs. I hope I can make more easy skirts in time for June.

Now this is completely random, but I noticed coke has joined the vintage bandwagon. I'm addicted to coke, and its nice to know that it is going all retro too.


enjoy your day,

xoxo,

Dibs


1 hour top experiment.

Thursday, May 5

Do you ever buy a pattern because it promised you would finish the item within a fixed number of hours?

I did just that a couple of weeks ago when I was on holiday up in Darlington. Most of the patterns promising amzing results within the hour or two hours are normally meant for knit fabrics and since I do not have an overlocker yet, I never buy them. My machine can sew knit fabrics, and I have actually tried sewing with scraps of jersey ( I think it was),  and it does sew well, but I don't have the confidence yet to actually make a whole dress or top.

I am still psyching my husband for an overlocker, dropping not-so-little hints here and there, sighing with constructed frustration at just the right moments, moaning about how my bday is so far away and I actually feel like receiving a present. Its not working so far, because I still don't have an overlocker, but I know sooner or later, the noise will get to him, and I shall be the proud owner of an overlocker. How soon is soon though, I have no clue. All I know is if I do succeed in making him buy me an overlocker, I shall nominate myself for an Oscar.

Anyways, back to the matter at hand. So, I bought New Look 6483, which promised me I would have a brand new top in 1hour. I quickly grabbed the pattern, but upon closer inspection, saw the little print, which said the said 1hour, was "sewing time" only.


Over the weekend, I cut out the top, and kept it in my project basket, waiting for a day when I will be inspired. Yesterday after work, presented the perfect occasion to make this top. I came home from work late (8pm), so I did not really have enough time to sew, but I really felt like sewing. So I took out my cut project, and set my timer.

1 hour later, I had finshed sewing the main parts of the top, but I still had to finish the seams and the hem This took an additional 1 hour. So, New Look, the 1 hour might be okay for an experienced dressmaker, but for someone like me who still has to read instructions in order to make a simple top, 1 hour is abit ambitious dontcha fink?


Good for work


I have never sewn so close to the edge before. I was very happy with myself when I did this binding.
 

Good for nights out with my jeans too.

 I'm really happy with this pattern. I used a metre I think. I don't know how much fabric I had in the first place because I bought this fabric as part of a £5 bundle of remnant fabrics from one of the shops in goldhawk road last year. There were many types of fabric in that bundle, and I think majority of them were about 1 metre each. So expect to see many more of such tops, with my remanat fabrics.


 The only changes I made to the project, was using bias binding instead of self facing the neckline and the armholes. I decided to go for the bias binding because it saves time, and also because I wanted to incorporate a plain colour. I could have used yellow, but I only had red at home. So red it was.

Next time when making this top, I will try not to make it so plain, using these Boden tops for inspiration.


Ruffles down the front


Serious neck treatment


Sew in beads.
 Its a good thing the Goldhawk Road Fabric Fandango is next weekend. That way I can buy more lovely fabric for these easy tops.

Have a nice day

xoxo
Dibs

Butterick Dress

Monday, May 2

I finally finished the Butterick 5351 dress.

The zip was a major issue for me as usual. I started by basting a regular zipper, then changed my mind, and used an invisible zipper. The result was quite unsatisfactory, as for no apparent reason, one side became shorter than the other. So I took that one out, and reinserted the regular zip. I am just so happy its finally done. Somehow I have to get over my fear of zips.

It was a really bright day today so I took this opportunity to drag my husband cum photographer out for a photo shoot. Unfortunately the sun was in my eyes, so my face looks very technical in the photos.


The sun was killing my eyes at this point, and of course the mister just had to take the picture at this time. I like the pic though.


To make View A (the one with the flower print), I bought 2 metres of  material from Goldhawk Road (as usual) for 5pounds  a metre. I also prewashed it, as it is cotton stretch, and I did not want it to shrink to unimaginable proportions after I'd spent hours making it.

The pattern instructions were easy enough to follow. My main issue with them was the fact that they rarely tell you when to finish the seams, so you would sew and sew, and not know when to overlock the seams. I've been making notes though, so next time I will know when to finish off a seam, so that the end product looks more like a daisy field, as opposed to a bomb ridden rice field, with unfinished seams all over the place.

I also find the hem shorter than I would have liked, so next time I will lengthen the hem. All in all, I think it came out ok. What I need to do now is probably practice zipper insertions more, so I don't spend hours trying to put a simple zip.

Have a good week everyone.

xoxo

Dibs

Green Simplicity Dress

Sunday, May 1

Did you  see Kate's Dress? No?. Hmmphh....then you are probably the last person on earth not to have seen it. I loved the top part of her dress. You can see it here at the Royal wedding website, which also gives the low down on the construction of the dress, and pictures of the day.

I was not really excited about the royal wedding though I was more than grateful for the extra bank holiday. So I had not planned to wake up at 6am ( when the BBC started coverage) to watch the proceedings. But I had been interested in seeing her dress, and I knew I was not alone in this, as I am sure everyone and their cats grandparents was also interested in THE dress. I spent Friday night working on Butterick B5351, and went to bed at about 4am, with just the zipper left to do. When I woke up in the morning and turned on the TV, the first thing I saw was the royal wedding church service, and caught a glimpse of Kate's dress. To say my eyes turned green with envy, would be a MAJOR understatement...lol....on the one hand, I was in love with the dress, on the other hand, I kept wishing I was in possession of such an exquisite dress, or in the absence of that, an imitation. But I think I would have to rob more than a few banks to be able to afford it.

Inspired by envy, I decided to express my mood through my favourite medium. Yep!! you guessed right. Sewing. I checked through my fabric stash and pulled out a green dress.So, considering the fact that I still had to finish my butterick dress , I needed to sew something simple, which could be finished in a few hours. Cue in Simplicity 9827.


This was such an easy pattern to sew. And who ever knew envy could inspire you, up to the point where you make very few sewing mistakes? . I was even so inspired, I decided not to use the facing provided by the pattern, but used a lace trim for the neck and the sleeve bands ( If Kate can have lace, I can too). This dress does not have closures, so there was no time spent mulling over how best to insert a zipper, or which buttons to use. It was just a breeze really. Hopefully it looks nice to you guys.


oh...a stray ribbon fold there. Will adjust that.
I decided to add a bow made from the ribbon trim.

I like using trims because they give you a unique finish, and you can go crazy with the various ways you can use them.  They are also a fast way to finish your projects without the hassles of understitching facings, or folding and slip-stitching hems.  If there's one thing I think I will be investing in on my sewing projects, is trim.

This dress hopefully gives you all an idea on my state of mind on friday.  I was green with envy, and at the same time loving the lace overlay on Kate's dress.

Right, I need to get cracking on the zip of my Butterick dress. Gosh I hate zips!!!


Enjoy the lovely weather people!

xoxo

Dibs

Where are they?

Friday, April 15

I have not been able to sew a dress this week, but I have noticed one thing about myself this year. I have been wearing the dresses I have so far managed to make this year more than once. Which is alot in my case. Last year I made a few dresses, wore only 1 out of the house, and now I don't know where they all are.

Last year though, I was not so fussed about the finishing of my garments, and I was not remotely bothered about seam edges and all that. Coupled with the fact that my machine(Brother LS 2125) was the most basic machine on the planet, I did not have fancy things like an overlocker foot which I now have with my Pfaff. Plus being the lazy little minx I am, hong kong seams and french seams were not to be even considered.

I think I am taking a more healthy approach to my sewing this year, and even my husband has noticed, and is asking me to consider buying more expensive fabrics ( who would ever have thought men would encourage you to spend more aye?).

So, I thought I should show some of the things I made last year that I was prooud of ( for about 1day).

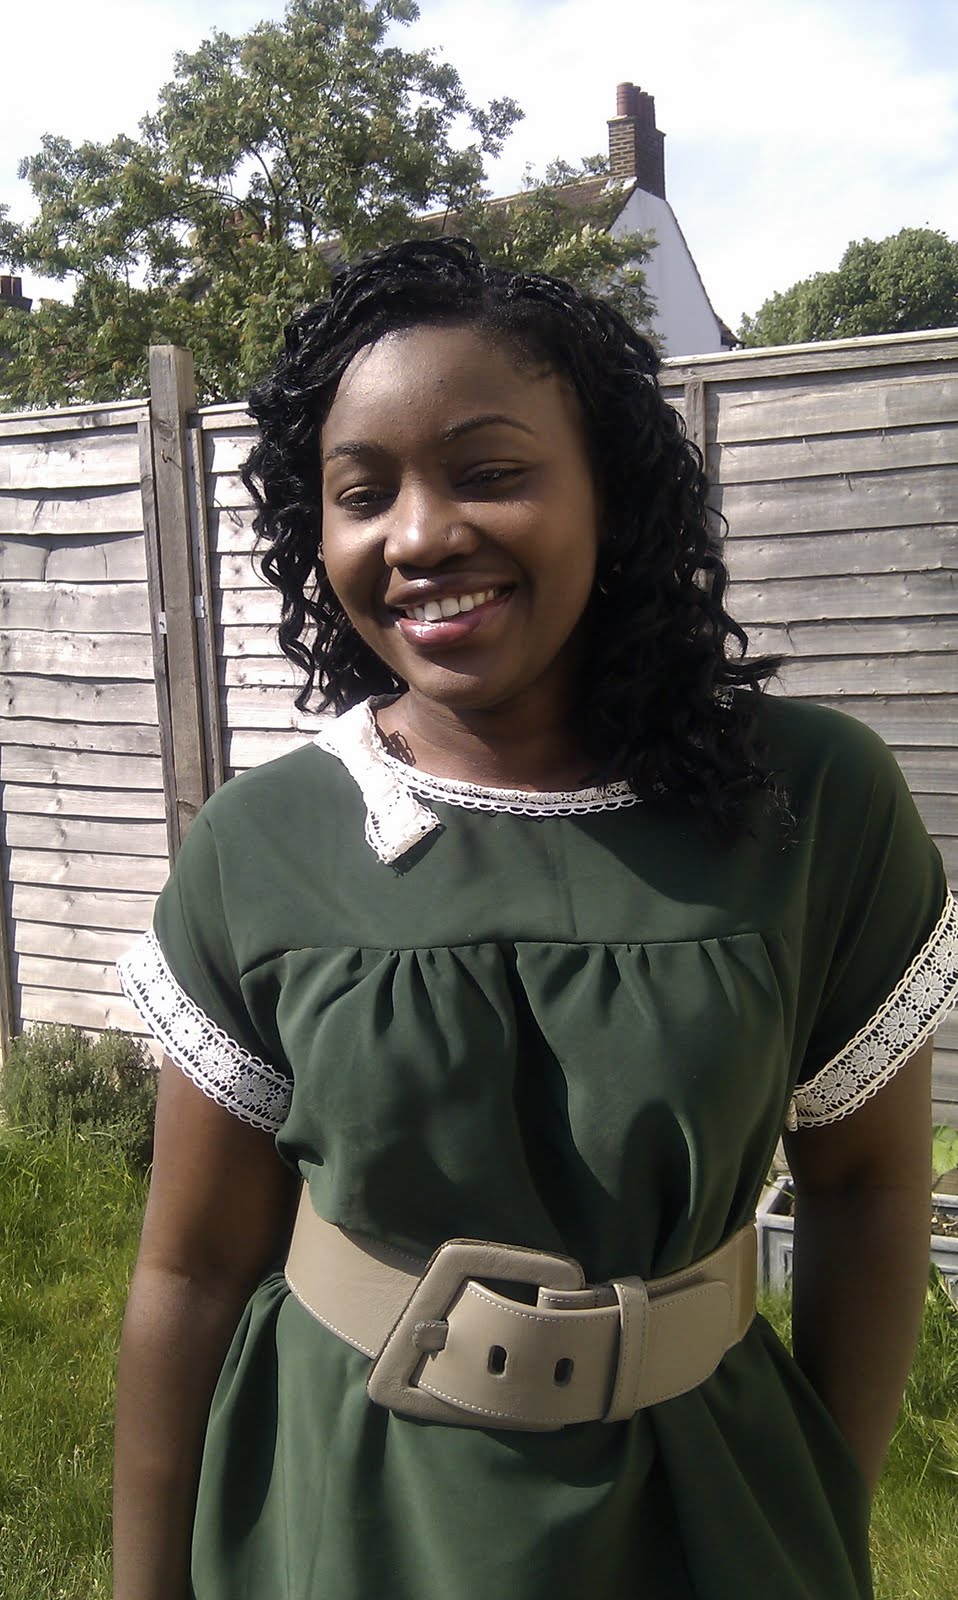
First up, the coffee date dress. Things did not go quite as planned with this one, so I changed the neck. Fortunately Elaine May (the selfish seamstress) was quite understanding, and actually helped me with more instructions on my all in one facing.

Where is it? - I have no clue. Will have to tackle it again this year because I really like the pattern, and it reminds me of me when I just started sewing seriously.

Next, the vogue 8470. I managed to do this dress, wore it round the house, then decided I did not place the zip well, took it off, and never put it back. I saw it the other day, and have kept it aside, to be looked at later this month hopefully. So I might (torchwood) be inspired to put a new zip by the time I go on holidays. I think it will be a nice holiday outfit.

Where is it: - Future project basket. Waiting for Princess Dibs to take pity.


Then I made this Burda magazine dress. I did actually wear this one to work, but i think I outgrew this. My pear hips decided to acquire more fat. So, I can't fit into this one anymore, and I THINK i donated this to a charity. Who will buy this, I don't know.  The pleats at the front were a bit dodgy i think . but nonetheless I wore it a couple of times.

Where is it: - no idea.


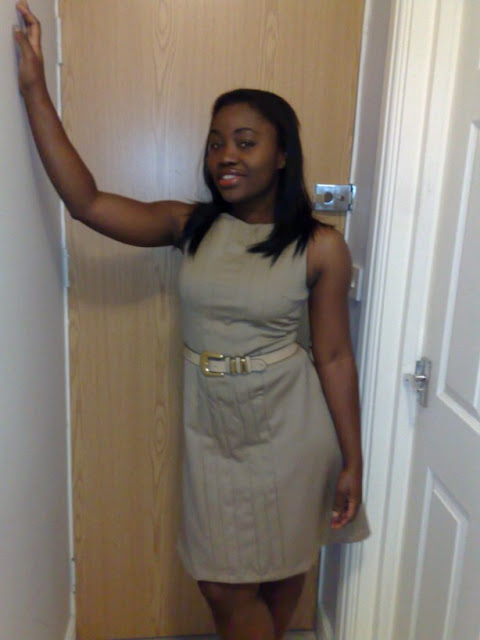
What I was most proud of that I made last year was the Vogue 8280. I cried a couple of times during the making of this dress. My husband had to tiptoe around me during the week I made this dress. I was quite happy with the end result though. I still have this pattern, and plan on making it again when i get a really good fabric. I will be using a cotton or wool fabric that has some stretch, so it will fit better. I did wear this one to a party the very day i finished it, and also a couple of times to work.

Where is it?: - I don't know to be honest. I grew bigger round the hips, and could not fit in anymore.


So, those were the things I made that I was proud of. The rest did not reach a noteworthy state of completion, so sadly (thankfully), won't be getting some blog time here.

Other things I made, and which I was proud of last year, were my wedding cake ( which I decorated mysefl) and my fascinator.


I bought a plain cake from M&S and decorated it. I made the flowers from sugar paste.


I folded the fabric and attached it to my top, to have that pink effect, and I just loved my fascinator.


I also put together the bouquet.
 I hope this time next year, I will be going through a list of what I made this year, and hopefully wearing one of them every week. Thats a big challenge, but I think with sewing, you have to push yourself all the time. I have 8 months to prove to myself that I can do it.

I am away for a week from today. Going to spend Easter with my in-laws. Unfortunately I won't be taking my beloved machine. So I won't be overlocking my seams. My mother-in-law has a machine so I will be able to make at least one dress. Hopefully I will have time to actually sew it and put some pictures up.

Happy Easter to everyone.

XX

Dibs